How To Do A Blog Content Audit (Without Nasty Spreadsheets). My Custom System For Managing Content In Wordpress.
Doing a content audit on your blog archives is useful for optimizing your marketing, SEO and traffic. But, how we can we do one without getting head deep into spreadsheets?

Have you been blogging for a little while now? Got a lot of posts back there in the archives? Then, listen up…
It is probably time to do a content audit.
The motivation for this post started right here at the Blog Marketing Academy. In fact, it originally began in 2019 when this post was originally written. I had been thinking of doing a content audit for awhile, but just never did. At the time, this blog had 1,448 posts in the archives.
At the time, I had 1,448 blog posts in my archives. Posts going all the way back to 2006. After all, what is today known as the Blog Marketing Academy actually got started quite some time ago. It started as WebbyOnline, then later transitioned to DavidRisley.com, then eventually rebranded to Blog Marketing Academy. The entire time, the Wordpress database stayed intact which meant all those posts were still there.
So, I set out to do a content audit. Really, the first real one I’d ever done. But, I’ll be honest…
I never finished. I got onto other things. After all, doing a content audit on a blog this big is no small feat. I did manage to update a lot of stuff and delete a TON of old content that would never serve any purpose any longer. I got the post count down to 770, which was a 47% reduction in the amount of posts.
Fast forward to 2023. And I’m picking up where I left off.
My approach has changed somewhat. So, in this post I am going to go over how I personally am conducting a full content audit on this site.
Everybody has different methods. Some people like to get all geeky with massive spreadsheets and all kinds of metrics. But, frankly, I think that’s too complicated.
My approach is to build a strategy and a system right within WordPress itself.
I’m going to show it to you. So, let’s dive in…
What is A Content Audit?
A content audit is when you revisit your entire blog archives and bring the entire thing up to your present standards. You’re deleting the crap, doing a bunch of updates, and optimizing for conversions. You’re also ensuring it is all being done according to your overall content strategy.
The basic actions you will be doing during a content audit are:
- Developing (or fine-tuning) your overall content strategy so that you know how to shape your posts.
- Deleting outdated blog content that gets little to no traffic and doesn’t fit your strategy.
- Updating content that is still relevant or worth keeping.
- Centralizing content so that you avoid too much overlap. This could mean combining posts or simply cross-linking them.
- Optimizing past content for effective conversion (i.e. relevant calls to action, lead magnets, etc.)
Depending on the size of your archives, this can be a big project. It won’t be something you just sit down and do in a day or two.
In my case, the project was so large that I stalled in the middle. 🙂 But, now that I’m back at it, this is basically going to form my major strategy for the blog for what I expect to be the remainder of the year of 2023.
After all, if you’ve got a large body of work back there to be combed through and updated, why publish anything new? You can update stuff along the way and simply re-publish as you go and it will be like brand new content all over again.
It starts out pretty easy because most of those earlier posts are utter garbage and you can just delete them. But, soon you start getting into optimization and updating and that is far more time consuming. That’s where you can actually make your life easier by re-purposing and updating existing content.
Why Even Do A Content Audit?
In an ideal situation, your blog would be fully optimized and updated so that every blog post in the archives serves a purpose. Every post would be:
- Up to date and provide value to people who arrive via search
- Fully integrated and cross-linked within your own blog (helps with SEO)
- Optimized for SEO and all the ranking factors that matter today
- Optimized to fulfill a marketing function so that it can be used as a marketing asset long term.
In other words, you don’t have crap back in the archives that are just sitting there not pulling any weight.
The benefits of this from a marketing perspective should be obvious. If every blog post in your archives is designed to attract new leads, move people into effective calls to action, or serve some other purpose in your marketing funnel, then that’s just going to help your business in every way.
But, what about traffic?
Many sites have reported nice traffic increases after doing a content audit and deleting blog content. Siege Media saw a 50% traffic increase after deleting 15% of their posts. Todd Tresidder talked on the SPI podcast about how he tripled his traffic after deleting a third of his content. There are other examples out there.
Why would deleting content help get more traffic?
It presents a cleaner footprint to Google and gives Google what it wants. Many bloggers think that the more you post, the more Google likes you. But, that’s not necessarily true. What Google wants is useful, updated content that is high-value. What Google doesn’t want is low-value content that isn’t updated.
As your archives get larger, it increases the size of your footprint. All those posts are going into your XML sitemap. While the XML Sitemap is mistakenly thought by many to be the main avenue for telling Google what to index, it is still important in defining the pages that you think Google should index. This can use up your crawl budget on useless garbage. As ContentKing explains it…
Crawl budget is the number of pages search engines will crawl on a website within a certain timeframe. Because they don’t have unlimited resources, and they divide their attention across millions of websites. So they need a way to prioritize their crawling effort. Assigning crawl budget to each website helps them do this.
In short, the search spiders only have so much attention they can give you. If that attention is being spent on crap, then it will affect your search rankings negatively. On the flip side, if you clear out the weeds by deleting the old, under-performing content while simultaneously updating the content that you leave in place, then your crawl budget is better spent on content that you WANT Google to see.
There is more to getting more traffic than deleting content, of course. But, clearly a content audit (and doing it regularly) is a fundamental component of a solid SEO strategy.
How Some Do A Content Audit (Do You Really Need All Those Spreadsheets?)
There are a lot of sites out there that discuss how they do content audits. There’s some really good data out there. For instance, Single Grain has a really stellar tutorial on how they do a content audit.
However, as you will see with their tutorial and many others on the subject, you will find some common themes:
- They get really spreadsheet happy. Tons of CSV exports and imports, combining data, etc.
- They usually rely on fairly expensive SEO tools.
Simply put, they make it complicated. Some of these tutorials were written by people who do SEO for a living, so they love spreadsheets. 🙂 But, if you’re not a spreadsheet lover, it would be easy to get overwhelmed. Plus, the action of keeping that spreadsheet useful over the long haul is going to prove tedious.
Case in point, when I first began my content audit, I started going that same route. I pulled traffic reports out of Google Analytics, exported the data to a spreadsheet. I then found a plug-in to export my blog posts out of WordPress along with word counts. Before I had even gotten into things like social sharing data, backlinks and the like, I already had a few spreadsheets that I wasted a few hours trying to figure out how to merge together.
Instead of actually working on my content, I was instead spinning my wheels trying to compile a friggin’ spreadsheet before I could even start my content audit!
The ironic thing is that much of that information that I was trying to compile into a spreadsheet was already right there inside of WordPress. So, why waste time moving the data and spinning my wheels like that?
Plus, if we boil this down to basics, do we really need all that data? Do we really need all those numbers and spreadsheets to determine if a piece of content is stale or whether it fits our content strategy or not?
I say we don’t. Call me a rebel. 😉
So, I wanted to have a content audit strategy that didn’t require a bunch of geekery. I wanted something that I could manage and a system that would help me maintain content moving forward.
Now, that doesn’t mean there’s no benefit to having such a spreadsheet. Doing a content audit is a project that can be done in a number of different ways. What I am going to present below is how I do it. It works for me. I find it simpler than an army of CSV files and spreadsheets.
Power lies in simplicity… and making things complicated is a symptom that there’s a system breakdown.
It Begins With A Content Strategy
In order to effectively do a content audit, you need to know what you’re shooting for. You need to know what you want your blog to look like as a body of content.
In my view (and experience), one of the biggest reasons we end up needing to do such massive content audits is because we may not have been blogging according to any strategy to begin with.
So, the first thing to be done is to formulate and outline your blog content strategy. I cover this extensively in my guide: Blog Content Strategy: How To Structure Your Entire Blog (So It Will Actually Work)
The gist of it is this:
- Outline your primary content silos for your blog.
- For each silo, plan out the following:
- Flagship posts. Some call them pillar posts. These will be your primary content marketing assets for the content vertical and they will thoroughly cover a primary topic of that silo. You need at least one for each silo, but could have a few.
- Standard posts. These are your “regular” blog posts. Each will be written to cover some aspect related to the content silo. Could be a sub-topic, a common question asked by people, or anything else which fits.
- Lead Magnet(s). Ever major content silo should have at least one matching lead magnet designed specifically to “hook” people browsing content within that content silo.
- Offers. Outline the products or services that match the material in that silo. Could be a unique offer, or taking your existing product/service and simply re-positioning it with a different hook to tailor it to that silo.
It is important to spend that time planning and brainstorming your blog content strategy. You want to do this regardless of how well your existing blog matches this strategy. In other words, don’t create your content strategy to fit the content you already have but, instead, create the strategy which is your ideal scene for what your perfect blog would look like.
- What topics are most important for the blog to cover?
- What are the guiding principles and beliefs you want your blog to convey to your readers?
- How do you intend to help them?
- What content formats will best serve them?
- What “next steps” will you convert your readers into?
As you do this, you can work your existing blog posts into the strategy if they fit. But, it is important to create the strategy that will work regardless of how well your blog fits currently. We’re going to use our content audit to mold the blog to the strategy.
As you are outlining your content strategy, make note of things such as:
- Content “gaps”. Things you should cover that have not been covered to date.
- Stale content. Things that are either outdated or just don’t fit your strategy any longer.
With a plan and strategy in place, we can then begin to sort through and manage our existing blog content with this plan in mind. We have something to go by.
Building A System To Maintain Your Blog Posts (And Do Our Content Audit)
WordPress, by default, just lists out our posts in chronological order in the backend. We can sort by date, but there’s very little in there to help you manage your content after the date it was originally published.
But, we can build something that fits out needs.
WordPress is highly customizable and, with the right combination of plugins, you can do quite a bit with it that you may not have thought possible.
What I did was set up a system of custom fields and custom screens within WordPress to make it easier for me to track what is going on with my blog posts.
The two main plugins I utilize for this are Advanced Custom Fields, Admin Columns Pro, and RankMath SEO.
Advanced Custom Fields is an incredible plug-in that allows you to use Wordpress’s in-built custom fields, but do so in a way where you can build them into your interface, have different fields types, and more.
I make heavy use of ACF internally for a number of different things. For the purposes of our content audit, however, I have certain tracking fields added to my blog posts for the purposes of the audit. I’ll share those fields below.
Admin Columns is an awesome plug-in that allows you to control the listings of content inside your Wordpress admin. You can customize the columns that show up in your admin screens, build in filters, and even create entirely different screens built with different column sets for different purposes.
Admin Columns also has some awesome features that make working with your posts much faster. Things such as inline editing, smart filtering, bulk edits, CSV exporting, and much more.
RankMath is one of the best known SEO plugins for WordPress and the one I use personally. It comes in handy during a content audit because we’re going to be optimizing each post for SEO along the way. The SEO scoring is a handy guide for that. Plus, we can use the SEO Details on the post list to see our focus keyword, link counts and more.
The version of Admin Columns you’d need will cost $89. Advanced Custom Fields is free and you could probably get along just fine with the free version for most purposes – including our content audit.
One thing to keep in mind, however, is that almost any REAL way of doing a content audit is going to involve paid tools. You could do it without spending anything at all if you were so inclined. You’re more than welcome to do it that way. 🙂
Here’s The System I Built Inside Wordpress
Using Advanced Custom Fields (ACF), I have created several custom fields to show up on blog posts. You may want to create others to suit your own needs.
The ones I created were:
- Last Reviewed. A date field I will use to track the date I last reviewed the post to see if there’s any updates needed. In a lot of cases, this would be the same as the “Last Updated” field already built into WordPress, however there will be no link unless I code it. Besides, not every time a post is reviewed would changes be needed.
- Next Review. A date field where I can set a target date in the future for me to circle back and review this post again.
- Done Optimizing. An internal tracking field set as a true/false field. I simply use it to track whether I have reviewed and modernized the post as part of my current content audit. Once I am done with this audit and more on a maintenance trajectory, I may remove this field.
- Admin Notes. A text area field where I can free-type notes to myself about the post. I often make notes about something to look at in the future, or notes about the calls to action included in the post.
I set these fields up as a “Field Group” in ACF to show up on blog posts.

In my case, I position the fields to show up on the side panel of the block editor.

So, it ends up looking like this:

The ACF plugin is incredibly flexible, so you can add/remove any fields you want that you would find useful to YOU in your own content audit.
But, you wouldn’t want to have to open up the post editor to see these fields. So, that’s where Admin Columns comes in. Using Admin Columns, you can customize the “All Posts” screen to have the columns you want. Here’s a quick look at my posts list screen:

I have used Admin Columns to show the fields that are most useful to me as I am optimizing posts during my content audit. I want to see categories and tags, last updated date, the SEO details (from RankMath), and my custom fields defined above.
The great thing about Admin Columns is the degree of customization it provides in the interface. When I click over to edit the screen, I can pick and choose which columns I want to see, in what order, and even control their column widths. I can make fields capable of being edited in-line, meaning I can change the field directly from the list screen without having to open up the editor.
While I don’t use it, Admin Columns can even do conditional formatting on rows. So, for instance, if I wanted to highlight posts where the “Next Review” date is past due, I could do that.
You can also set up multiple versions of the same screen – each with different sets of columns. You can see that I have several different versions of my post list:

So, personally, I find Admin Columns to be incredibly handy for doing a content audit. What many people end up trying to use spreadsheets for… I can do it right inside WordPress where the content actually sits.
Admin Columns works on any listing screen within WordPress. That includes pages, custom post types, users, etc. Just a great plugin.
Now, the beauty of using Advanced Custom Fields and Admin Columns together is that you can design any system or set of screens that you need for your own purposes. You’re not stuck with whatever some plug-in creator designed to include for you.
If you need or want additional fields that you need for your own tracking, you can create them. Ideas I’ve had include:
- A dropdown of team members so you can assign who is currently working on a post (different than the post author) if you have a multi-person content team.
- Using an ACF Repeater Field to have an internal changelog on any post, so you can track every change you did and what you did.
- Use the Checkbox field with ACF to build in your own process checklists for every post and track them right there in the interface.
- An internal scoring system where you can score your own content on how good you think it is.
You’ve got a lot of possibilities. You can customize the whole thing and build your Wordpress interface to suit your own internal processes. And in terms of doing a content audit, you’re not exporting a single CSV file! 😉

How I Perform My Content Audit
At the big picture, my goal here is to comb through all existing blog content and make it fit my present content strategy. Recall that the content strategy starts with my blog silos, the individual posts within those silos, calls to action and lead magnets. All that was covered above.
I also have certain things I want to make sure are covered. I’ve identified content “gaps” of things I have not covered at all or did do inadequately.
It is then time to start going through everything and bringing everything up to the present.
I started with my earliest posts and started moving forward in time. Obviously, since it had been so long since those posts were written, I did a LOT of deleting of posts in the beginning. Frankly, I deleted most all of the older posts because they were completely useless to my current strategy.
The way I do it, there are 6 potential outcomes when I evaluate a blog post:
- Leave it as is. Post doesn’t really need anything. Usually for the most recent posts.
- Update & Optimize. Post is good. Make some edits to ensure it is updated, has good calls to action, and SEO optimized.
- Update, Optimize and Republish. Same as above, yet I find the post good enough that I want to re-publish it and re-feature it.
- Delete & Redirect. Delete the post but place a redirect to a relevant post I intend to keep.
- Delete. The post is useless and gets no traffic, so I just delete it without a redirect.
- Consolidate & Republish. Post contains duplicative content that overlaps with other posts, so I consolidate them all into one new, fresh post on the topic and re-publish.
So, as I am evaluate posts one-by-one, I ultimately decide on one of those 6 outcomes. Now that I think about it, it might even make sense to create a custom field just to select which of these 6 outcomes I go with. That could be useful if I don’t do it immediately.
Now, how do I determine which of those 6 outcomes I go with?
Ultimately, it is a judgement call. And there’s no wrong answer since it is your blog and you can do whatever you want. But, one thing you definitely want to consider is any existing traffic the post gets.
Evaluating Existing Traffic On A Blog Post
Hopefully you are tracking the traffic on your blog. You’re going to want to look at the traffic levels on each individual post so that you don’t delete something that is actually useful to you.
Most blogs tend to use Google Analytics. You may use something else. Personally, I recently switched over to a Google Analytics alternative called Fathom. Of course, since the switch was recent, I am still using Analytics to go back in time and see what kind of traffic my posts have gotten.
Regardless of the traffic tracking software you use, you want to plug in the URL of each blog post as you are evaluating it to see what kind of traffic that single post is getting. I would recommend going back at least 12 months to see what the traffic looks like.
In Google Analytics, here’s how you find it:
- Go to Behavior > Site Content > All Pages.
- Use the date selectors to change the graph range to go back about 12 months. It doesn’t really matter the specific length of time. The idea is just to get a long-range view.
- Copy/paste the URL of your blog post without the domain name into the little search field right above the list of posts.
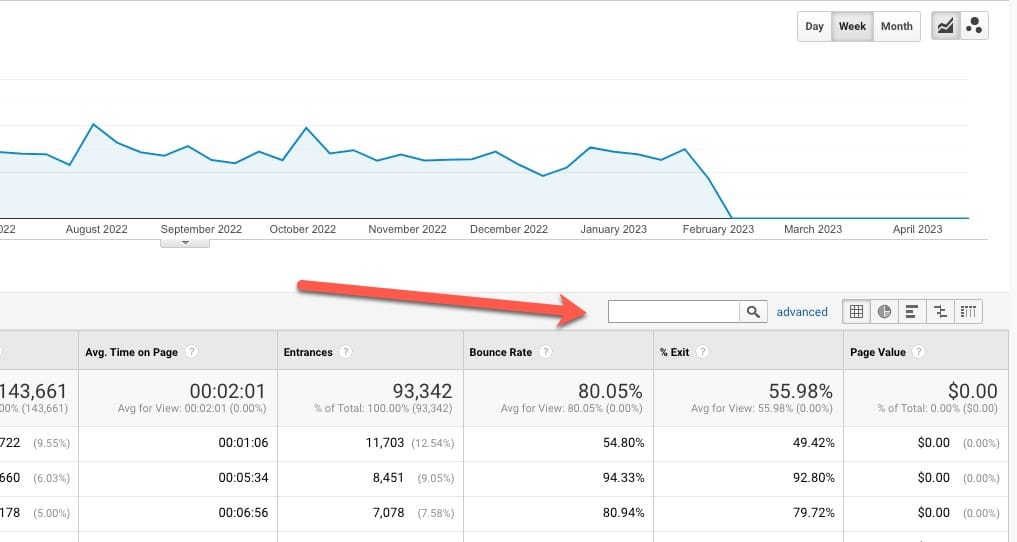
Note that it won’t pick up the entire URL with your domain name. You want just the part after the domain. So, for instance, this very post is https://www.blogmarketingacademy.com/blog-content-audit/, so the part I would use to search is /blog-content-audit/.
You then want to look at the traffic trends. As you’ll normally find, some posts on your blog do OK while others sit there and barely get any traffic at all. Especially on your older posts, you are likely to find a few blips on a 12-month traffic graph.
In addition, I will sometimes check for backlinks to the post before flagging for removal. There are a number of paid tools that can do this, but another way to do it (for free) is to use Google Search Console. This will show you how your site is looking and performing in the eyes of Google. There’s quite a lot of information you can learn from Search Console, but one of them is backlinks that have been indexed to be linking to your blog post.

To get to this screen…
- In the menu, click on “Links” under the “Manual Actions” section.
- Under “External Links”, click on “More”.
Now, this screen will be a raw list of URLs from your site. To see data for one particular page, you’ll need to filter the list.

Click that icon and select “Target Page” as your filter option. Then, enter the full URL to the page you want to view link data for. If you then click on the entry itself, you can view the actual sites which have links pointing to this post on your site.
Now, what do you do with all this data? Again, it is just another data point by which to evaluate what to do with your post. If your post has barely any links to it or the links are pretty low quality, then that’s an indicator (in context with the others) on whether you can delete the post. If your post has some decent backlinks, then you’d want to keep the post and update it.
Making Judgement Calls On What To Do With Your Posts
You’ve got a lot of data at your disposal here that gives you a sense on whether your post is a performer or not. Obviously, posts which are performing OK or very well, you will definitely keep. The lower performers (or the ones sitting there doing nothing) could be deleted, however you may elect to update it instead because the material is good and fits your content strategy.
So, it always comes down to making judgement calls as you go. Here’s the general decision tree that I use:

As I am going through these posts and making judgement calls on them, I am also keeping my eye on the big picture. For instance:
- I look for gaps on the content on my blog, or topics I don’t cover very well.
- I look for opportunities to combine posts together into a new Redwood post.
- I make note of the posts which are performing well in search, traffic, or socially and these may get extra attention from me in terms of optimization for calls to action.
And as I go, I am adding more post ideas to my to-do list and extending out my content calendar. Obviously, when I flag a post to be updated, it doesn’t mean I have the time to update it right away. Often, I will use my Admin Notes field to make notes to myself about my plans for the post.
By doing this and using my “Content Audit” screen, I can easily maintain my workflow and not duplicate my efforts. I only have to decide once what to do with a post then I won’t waste my time doing it again because I forgot what my thoughts were.
What To Do With Each Post You Update
If I flag a post as “Consolidate” or “Update”, that’s when the real work begins. It is time to actually do something with that post and that takes longer than deciding what need to be done.
Rather than repeat myself, I’ll simply direct you to 2 important blog posts all about the best ways to prepare and optimize a blog post:
- The Ultimate Guide To Search Engine Optimization For Bloggers
- Anatomy Of The Perfect Blog Post: A Complete Guide To Ideal Blog Post Structure And Formatting
So, as I update a post, I am keeping everything in those posts in mind.
My own personal mental checklist for each post includes:
- Making sure the content is updated and is something that not only fits my overall content strategy, but is something I would be happy to direct people to.
- Selecting a suitable target keyword phrase and then optimizing my SEO score using RankMath to get the score as high as possible.
- Ensure I am internally linking to other quality posts across my blog.
- Ensuring the post has a call to action and/or a lead magnet opt-in. Often both.
- Ensuring the post has a table of contents at the top.
- Ensuring the post is properly categorized to show in the right content silo.
- Ensuring the post has a feature image defined, a suitable excerpt, and is otherwise fully optimize to show up properly across the blog as well as in search engines and social media.
- Auditing any blog comments on the post and deleting the ones that are spammy or add no value.
The idea is that each post meets my current standards and strategy.
Often, I will include a little note at the top or bottom of the post with a timestamp to mention what was updated in the post. This shows future readers that you’re maintaining things and can explain posts with a date of publication in the past.
In cases where I decided to re-publish, I will just change the publish date to the present and re-save. This puts the post out there as if it was brand new. I only do this in cases where the post is very high value and I think there’s some value in re-featuring it.
Lastly, I make sure to set the date of “Last Review” as well as a target date for “Next Review”. The next review date is just something in the future I think is appropriate to re-visit the post and make sure things still look good and updated.
Using Admin Columns, the next review date shows up. I can sort by the field to find the posts I need to look at. I can also use conditional formatting to highlight the posts which are past due.
Once the content audit is done, this forms the basis for my ongoing content management strategy moving forward to ensure things don’t get too far outdated again.
Major Takeaways
This post gives the “guts” of how I personally am managing my own content audits. In my case, I prefer to do it “in house” here in WordPress rather than go through all the extra time and effort to get everything into spreadsheets.
You can – and should – customize this system to fit your own needs. You may have other custom fields you want to add to really tailor WordPress to your needs.
With all that said, here are some major takeaways that I hope you will take away from this post:
- You can mold WordPress into a system that suits your needs for ongoing content management. You’re not stuck with what’s there by default.
- You absolutely need to think long-term and strategically about your content and should be going back and updating it periodically.
- Whenever you publish a post, consider future maintenance of the post. Set a date for next review.
- Don’t clutter up your blog with posts that won’t stand the test of time. Unless you’re a news blogger and that’s the nature of what you do, such posts are almost inevitably going to be deleted in a future content audit.
- Think of every post as an ASSET. Sometime that serves a purpose for your business moving forward and can serve long-term. Frankly, if it won’t serve as an asset, why publish it at all?
A well-run blog is a living, breathing thing. It isn’t uni-directional. It isn’t only about publishing new, new and more new. You’ve got to have a holistic strategy… and that means not forgetting about the stuff you already hit the publish button on.

David Risley has been building on the web since 1998 and founded Blog Marketing Academy in 2008. After years helping bloggers and online entrepreneurs grow their businesses, he now runs Concierge — a done-for-you WordPress management service for membership sites and online businesses. He manages hosting infrastructure, handles the technical heavy lifting, and keeps client sites running at peak performance. Click to read his full origin story.