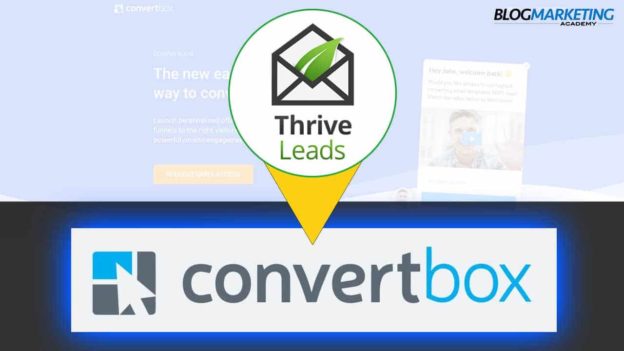
How To Integrate ConvertBox With FluentCRM
FluentCRM and ConvertBox don’t technically integrate, but here’s how you can send new leads from ConvertBox into FluentCRM.

Awhile back, I talked about a new Wordpress-based marketing automation CRM called FluentCRM.
FluentCRM is an extremely promising tool. It is already powerful enough to power most people’s email lists and save a TON of money in the process. Development is quickly moving forward, too. You can see my review of FluentCRM to see how far it came so quickly.
One of the issues of a new tool like this, though, is the lack of integrations. We’ll be using tools that are more established and we want to use it with FluentCRM.
One such tool is ConvertBox. This is a tool I personally love and recommend.
READ: ConvertBox Review: The Good And Bad Points Of This Opt-In Software And How It Compares
But, as you might guess, there is no FluentCRM is not on the list of official ConvertBox integrations.
In fact, there’s no direct integration with most of the opt-in form tools on the market. Right now, you need to get a little bit creative to make it work.
But, there is a way. 🙂
Here’s how to make a tool like ConvertBox send new leads into FluentCRM.
FluentCRM supports the use of web hooks. We will use this to take new leads from ConvertBox and send them into FluentCRM.
In fact, web hooks will enable you to integrate FluentCRM with a very wide variety of external tools in a similar fashion.
What is a Webhook?
A webhook is basically a script which sits there on your server and accepts data from the outside.
Data will be sent to this webhook script in a particular way, then that script turns around and processes that data as designed.
If an app you’re using has a webhook, that means it is designed to be able to “hook” into external applications by accepting data from the outside.
And, in the case of FluentCRM, we will be using webhooks to accept data for new leads (name, email, etc.) and add them to our email list.
How To Use FluentCRM Web Hooks
In FluentCRM, go to Settings > Incoming Web Hooks. Then hit the “Create Webhook” button.

You’ll get a screen where you enter the details of where you want new leads to go when this webhook is used.

Enter the following:
- Enter a name for your webhook. Something descriptive that will tell you what it is for. This is just for internal purposes.
- Select which list(s) you want these leads to be put onto.
- Select any tag(s) you want added to these leads as they are added to your system.
- Select the Status of these leads. Pending if you want them to double-confirm, and Subscribed if you want them to go right onto your list.
Then save your webhook.
You will get a screen which shows the data you just entered. It will also give you the exact URL of your webhook as well as fields that you can pass into the webhook.

That URL it gives you is important. You will be copying/pasting that into ConvertBox (or any other external system you might want to use).
Advice On Setting Up Your FluentCRM Webhooks
As you will see, you can set up as many different webhooks as you want. That’s important. And here’s why…
If you’re sending in leads from external sources, you may want to capture information that is specific to that source. For instance, what if you want to know exactly which opt-in form they used?
With FluentCRM as it is, the only way you can view specific opt-in form usage on leads is if you use WP Fluent Forms. Otherwise, you just can’t do it.
So, what you’d want to do is use TAGS for tracking purposes.
Now, it is possible to pass tags in via the webhook. This would allow you to use one webhook and add leads with different tag sets depending on the source. That data needs to be passed in a particular way, though, and sometimes it is more geeky than you have time for. 🙂
The alternative is to just set up multiple webhooks and use the settings for each one to “hard wire” which tags are added.
You can see in the screenshot above that I am using the Homepage tag on that webhook. I use that so that I know that those particular people came from my homepage opt-in form.
As FluentCRM develops further, I expect that it will not be necessary to use tags for this. Using tags for tracking isn’t ideal.
Setting Up ConvertBox To Send Leads To FluentCRM
So, now that we have a webhook set up in FluentCRM, we need to set up ConvertBox to use it.
I won’t show you here how to set up an opt-in form on ConvertBox. The process is the same for any other opt-in form you’d create on the platform. FluentCRM doesn’t change anything on that front.
But, let’s talk about the integration…
Under the Form Settings for the opt-in form, you’ll tell ConvertBox what you want it to do when people submit the form.

First, under the Fields tab, you’ll want to make sure that the field names match up to what the FluentCRM webhook expects. You will do this by setting the parameter name.
If you look at the fields in the webhook screen in FluentCRM, you’ll see this:

It is a list of the contact fields (from FluentCRM) and the field key name used to pass in data. The main (and more important) field is, of course, the email address. And you can see that the field name is just “email”. Likewise, if you wanted to pass in the person’s first name, you would use “first_name”. You get the idea.
Now, in ConvertBox, select the corresponding field. Then, check the box labeled “Set a custom parameter name for redirect URL“. And type in the field key name.

You will do the same for each field in your form. You want to make sure that the custom parameter name for the field matches what FluentCRM expects as the field key name.
Once that is done, click on the Integrations tab.

Click on the “Add Integration” button and then select “Webhook” from the Dropdown.
In the Webhook URL field, copy/paste the URL that FluentCRM gave you for your webhook.

Save it. At this point, you’re basically done! 🙂
Now, you just need to test the integration. If you haven’t already put your ConvertBox form on your site, do so. Then, just opt-in using your own email address and see if you are added to the FluentCRM email list.
Keep in mind, all FluentCRM automations work. So, you can trigger automations to send welcome emails, send lead magnets, and do whatever you need to do.
Limitations Of This Integration
One of the best features of ConvertBox is the two-way integration with the CRM. This gives you the ability to precisely control WHO sees every call to action by selecting CRM tags to include or exclude.
It works beautifully with any CRM that ConvertBox officially supports. Unfortunately, FluentCRM is not one of them. It is the reason we even need to use webhooks.
When using webhooks, you do not have this two-way integration. Webhooks are a one-way flow to get data INTO FluentCRM. But, they do not pull data back out.
This means you do not have the ability to precisely target visitors using CRM tags when using this type of integration.
There are some alternatives you can look into, however.
If you’re in a situation where your subscribers are logging into your site (such as a membership site), then you do have targeting options available.
- If you use Gutenberg blocks for your site layout, FluentCRM does have conditional blocks to show/hide forms based on tags. I have suggested to them to add this capability to a Wordpress widget to make this more universal.
- WP Fusion has support for FluentCRM. WP Fusion would enable all kinds of options to show/hide content based on tags inside FluentCRM. You could also use it to show/hide optin forms. It could only hide embedded ConvertBox forms, though, and only then by surrounding the shortcode with conditional shortcodes from WPFusion.
READ: WPFusion Review: Turning Your WordPress Site Into A Marketing Powerhouse And Membership Site
For us to have a FULL integration with ConvertBox and FluentCRM, it would be up to ConvertBox to build it. FluentCRM has the APIs available. It is just up to ConvertBox to see enough people requesting FluentCRM integration for them to build it. As it is, ConvertBox doesn’t integrate with any Wordpress-based CRM. I hope this will change as the space matures.
So, that’s how to do it. If you have any questions, just ask below. 🙂
ConvertBox Essentials (Bonus Training)
You can get access to our ConvertBox Essentials course as a free “thank you” bonus when you secure Convertbox through us.

You can watch over my shoulder while I personally show you how to get set up with ConvertBox and how to implement it in your business. My goal will be to help radically speed up putting ConvertBox to use without having to figure it all out on your own using just their documentation. Plus, I have a whole section on USING ConvertBox to show you some of the coolest uses for your account.
You can get access to this training FOR FREE as a special bonus for securing your lifetime ConvertBox account via our affiliate link. It obviously costs you nothing extra, but I will earn a commission. But, in exchange for your trust, I will hook you up with a full training course and my personal support as you implement ConvertBox.

David Risley has been building on the web since 1998 and founded Blog Marketing Academy in 2008. After years helping bloggers and online entrepreneurs grow their businesses, he now runs Concierge — a done-for-you WordPress management service for membership sites and online businesses. He manages hosting infrastructure, handles the technical heavy lifting, and keeps client sites running at peak performance. Click to read his full origin story.