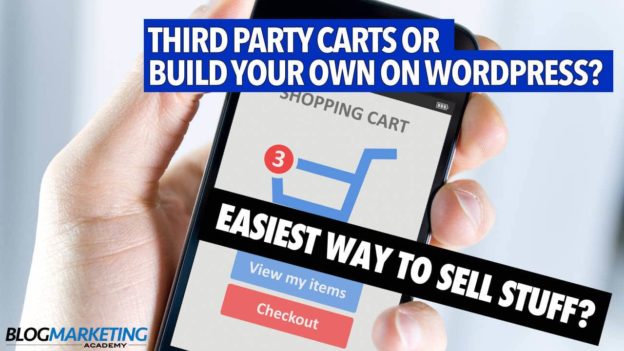
How To Create Online Courses On WordPress Without An LMS Plug-in
In this video, I will show you how to create online courses on WordPress without using an LMS plugin. We will just use custom post types.

Is it possible to create online courses on WordPress without an LMS plugin like LearnDash or TutorLMS? Yes, it absolutely is. In fact, depending on your needs, it is actually preferable.
In this tutorial, I’m going to walk you through how to build a simple online course setup inside of WordPress using features already built into WordPress.
And you can forgo the extra expense and overhead of buying a big, fancy LMS plugin.
Let’s go…
Who This Will Work For (And Who It Won’t Work For)
A learning management system (LMS) plugin brings in a lot of bells and whistles that you may want on your membership site. Features such as:
- Student progress tracking
- Assignments
- Instructors
- Quizzes
- Sequential delivery of course lessons
- Pre-requisites
- Certificates
Every LMS is different, but the idea is that you can build a full academic system on your WordPress site.
If you need or want those features, it will always be easier to use an LMS. They also have integrations with a number of other plugins to enable cool automations. For instance, you could couple the progress tracking capability of the LMS with WP Fusion to drop a tag when the course is completed and therefore follow up with them automatically via email.
But, what if you don’t need all that?
What if all you need is a way to put course lessons on your site? To place your videos and your text into lessons, organize the lessons into a course, and put it on your site.
If you have simple needs, you can build online courses without an LMS. In fact, you could build an entire course library. It is also nice how flexible this setup can be. For instance, LearnDash doesn’t support single-video courses without an add-on plugin. If you just want one-page training courses, a full LMS can easily begin to feel like a lead weight.
What you will not have is any of the functions of an LMS. But, for a lot of membership sites I have been involved with, those functions aren’t even used.
How It Works
WordPress is far more flexible and expandable than it looks at first. When you install it, it comes with two post types: pages and posts.
However, WordPress is quite capable of having custom post types (often abbreviated as CPT). In fact, many plugins you would install and use make use of custom post types to operate. Any LMS plugin you install is simply creating custom post types for your online courses.
Not only does WordPress support custom post types, but it also supports custom fields. This means you can use WordPress to manage any kind of content you want as well as add any special fields to it that you want.
All of this CAN be done using pure PHP code without any plugin. However, that’s a very nerdy way to go. 🙂 Instead, I highly recommend using a tool such as Advanced Custom Fields (ACF).
The ACF plugin will enable you to create custom post types, custom fields.. and everything you need. You can use it to build your own custom online course system. You can also use it to build almost anything else you please.
Let’s Build Your Online Course Setup
OK, let’s go ahead and build a basic online course setup.
First off, you need to install and activate the Advanced Custom Fields plugin.

ACF does have a PRO version. You don’t necessarily need it. It does have some additional features and field types that you may find useful, however for the purposes of building out our basic course setup, the free version works just fine.
So, with ACF ready to go, let’s build this thing…
Want Me To Build This For You?
If you would like me to set this up for you on your site, I can make it happen for you pretty quickly. This would include customization of the display of your online courses on your website as needed. Typically, 1-2 service credits would do the trick. Happy to help!
#1 – Create Our Custom Post Type
Go to ACF > Post Types and click the button to add a new post type.
Enter your plural and singular labels. Basically, this is what you will call this content type. Let’s call it something like “Trainings” and “Training”. The “Post Type Key” will be automatically filled and you can just leave that alone.
You also want to click the toggle to make it “Hierarchical”. This is important so you can nest trainings beneath each other, therefore giving you the option to have courses with multiple lessons.
Your screen will look roughly like this:

Next, click on the toggle to open up the Advanced Configuration. Then, under the “Supports” section, let’s enable a few features for our custom post type:
- Author (if you want your courses to have various authors)
- Excerpt (handy if you want a short description of the course to show up in your library when looking at it)
- Custom Fields
- Comments (if you want students to be able to comment on training pages)
When done, click “Save” to create your post type. You will now see a “Trainings” option in your side menu.

#2 – Create A Course Category Taxonomy (Optional)
Now, this is totally optional. But, if you are looking to build a whole library of trainings and you think it would be useful to have categories for your courses, it is easy to build.
In WordPress lingo, this is called a taxonomy. Basically, a taxonomy is simply a way to categorize content. Both categories and tags are kinds of taxonomies. Posts have a taxonomy already created by default so that you can have categories in your blog. However, just as you can create custom post types and custom fields, you can also have custom taxonomies.
Go to ACF > Taxonomies and then click to add a new one.
Just like for a post type, you want to give your taxonomy a plural and singular name. In my example, let’s use “Training Categories” and “Training Category”. Let the Taxonomy Key auto-generate and there’s really not much need to alter it.
For Post Types, this is where you assign this taxonomy to the post type you want to use it on. In our case, we’ll select “Training” to attach this taxonomy to the post type we just created above.

You can make the taxonomy hierarchical if you want the option of sub-categories. That’s up to you. I usually find it isn’t needed.
Save the taxonomy. When you do, you will now find “Training Categories” underneath the “Trainings” menu item to serve as categories for your training courses.
#3 – Create Any Necessary Custom Fields (Optional)
By default, this post type is going to look and work a lot like blog posts. You’ll have a title, the content, the feature image, excerpt, etc. It will all look quite familiar.
For some, this is enough. The standard interface is all you need to throw text and videos into your training. Anything you could do for any page or post, you can do for your trainings.
However, you may want other custom fields for other items related to your trainings. For instance:
- Links to downloadable files associated with the training
- Select other trainings to be your “Related Courses”.
Really, you can customize your trainings to your own needs using all kinds of custom fields. It is important, however, to bear in mind that getting your custom fields to show up on the public side of your site will require some extra work.
See, it is easy to create custom fields and have them show up in the admin panel of WordPress. However, actually using those fields on the front-end requires extra coding to output it.
Some field types are pretty easy to use on the front-end using your theme. Most page builders and quality block-based builders have ways of bringing in dynamic text and other items from custom fields. In other cases, you may need to install additional plugins to make use of certain kinds of field types.
Here’s a few potentially useful links for using custom fields in various popular themes and page builders:
- Elementor Integration With ACF
- Anywhere Elementor Pro – ACF Integration. If you want more powerful support for custom fields than Elementor gives by default.
- How to Use Fields Set Up With the Advanced Custom Fields Plugin in Thrive Architect
#4 – Enter Some Course Content
In order to be able to put together the look and feel that you want for your courses, you need to have some content to work with.
So, you want to go ahead and enter at least one course. It doesn’t even need to be a real course. Just put something in there that we can begin to play with and see what this is going to look like.
The beauty of this simple course system is how easy it makes creating single-lesson courses. Many LMS plugins do a poor job of mini-trainings since they are built for big courses with lots of parts. But, I am definitely a believer in the fact that shorter, to-the-point trainings are often the better way to go.
If you need to have multi-lesson courses, then you just create those trainings the same way but you select the main course as the parent.
#5 – Customize Your Theme To Suit Your Courses
The last major step here is to make your courses look the way that you want on the front-end of your site.
By default, your theme is going to output courses using the same template used for pages. It will be treated just the same. However, you can design your own templates specific to your trainings and make them look entirely different.
Now, how you do this on your site is going to vary quite a bit depending on what you use for your theme.
For some themes, you will need to create a child theme and build your templates more or less manually. Frankly, I’m not going to bother to show you how. If you are still using a theme that requires that kind of geekery, I’ll leave it to you to figure out the mechanics of creating those templates manually. It isn’t all that difficult if you have some technical background, but it is beyond the scope of this tutorial.
Many themes and page builders have ways to build custom templates and simply assign them to a custom post type. By doing it this way, you can design your templates in an easier way and, once published, your template will simply override the default display of your theme. Here’s some advice specific to various popular platforms:
- Elementor Pro. Regardless of your theme, you can use the Theme Builder of Elementor Pro to design a template for your trainings. When you publish the template, you use the Elementor Display Rules to use the template for all singular posts of the “Trainings” post type. Elementor has a nice video tutorial on Youtube on how to use Elementor and ACF together to do this. In their tutorial, they’re building an entire real estate site, but you can use the same methods.
- Thrive Theme Builder. You can create a template in Theme Builder and assign it to display for all “Trainings”. Here’s a rundown on how to create a template in Theme Builder for a CPT.
- Kadence Theme. On the pro version, you can use Kadence Elements to create a custom template to fully override the standard theme template, but only for the “Trainings” post type. You can build the whole template using the blocks editor.
Selling & Protecting Your Courses
What we’ve built is basically just a custom content library. There will be no functionality for selling these courses or protecting them so that only valid members/customers are allowed to access them.
You will need to use other software for that. However, if you have that kind of site, then you likely already have that stuff in place.
My preferred setup for membership sites is FluentCRM + WP Fusion + WooCommerce. So, I would sell the courses using WooCommerce. When they buy, it adds a tag to indicate they did so. Then, I’d protect the course using WP Fusion and specify that only people with the corresponding tag on their profile are able to view the course.
Related Content:
To have a global membership that unlocks all courses at once, you set it up just the same way. You lock down all courses using the same tag. When the person buys the membership, you assign that tag. When they buy, it instantly grants access to every single course.
You’ve got a ton of flexibility here.
If you use a more traditional membership site plugin like MemberPress or Wishlist Member, then you just set up member levels for this stuff and ensure each training is locked down and only unlocked for certain member levels.
Could This Be All You Need?
Personally, I think the days of huge online courses are dying. With so much content already out there and people’s shrinking attention spans, putting all the work into creating some massive online course and expecting people are going to go through it entirely is likely a fool’s errand.
People want results and they want it quickly. And I think it is a much stronger selling proposition to create shorter-form content to show them how to do something – complete with any shortcuts you can possibly muster – and put it into your course.
Clear, concise mini-trainings versus full multi-module courses with all the bells and whistles.
If you are growing a full membership site, this kind of content is also much faster and easier to make. Put it onto your schedule to create, perhaps 1 or 2 of these trainings per month for your members. Each training is just one, single page. Something they could fully consume in no more than an hour and then be off making things happen.
This doesn’t mean there’s not a place for more fully developed, longer courses. If you feel you need that, then by all means use an LMS. You may even have a point for using an LMS for certain core offers and/or flagship courses, but you use the above setup for a library of smaller trainings that changes a lot more often.
It is up to you. 🙂
Want Me To Build This For You?
If you would like me to set this up for you on your site, I can make it happen for you pretty quickly. This would include customization of the display of your online courses on your website as needed. Typically, 1-2 service credits would do the trick. Happy to help!

David Risley has been building on the web since 1998 and founded Blog Marketing Academy in 2008. After years helping bloggers and online entrepreneurs grow their businesses, he now runs Concierge — a done-for-you WordPress management service for membership sites and online businesses. He manages hosting infrastructure, handles the technical heavy lifting, and keeps client sites running at peak performance. Click to read his full origin story.