BuddyBoss Blog Layout: How To Easily Create Custom Blog Post Templates
The BuddyBoss blog layout is quite simplistic. Here’s how to use Elementor to visually design your own custom blog post template to use with BuddyBoss.
The BuddyBoss theme is pretty useful. I even called it perhaps the best theme for membership sites. With the community functionality, integration with WooCommerce, multiple LMS systems and more… it is a bit of a swiss army knife.
But, the actual Buddyboss blog layout leaves something to be desired. It is quite basic and underwhelming.
Since the BuddyBoss theme is a traditional theme and not one based on a visual builder, this makes modifying it a geeky experience of code, CSS and child themes.
Or… does it?
The good news here is that BuddyBoss works very well with Elementor. In fact, while BuddyBoss claims to be “compatible” with other page builders like Beaver Builder, Elementor is the one that it officially integrates with.
By using Elementor Pro, you can create beautiful landing pages, member dashboards and more. And yes…
You can use Elementor Pro to modify the way the blog on your BuddyBoss site looks.
Use The Elementor Theme Builder To Override The BuddyBoss Blog Layout
Under Templates > Theme Builder (if you have Elementor installed), you will find that you can use Elementor to create portions of your site’s theme.
Click Add New to create a new template. To target individual blog posts, you would create a template of the type “Single Post”. You can name it anything you want.

You’ll then be presented with a list of pre-built post templates you could use if you like. In my case, I just closed that since I didn’t want to use a template. I just created my own.
You’ll be presented with a blank template with the other components of your theme sitting there. And you’ll use the Elementor components to assemble and design your post template the way you want it to look.
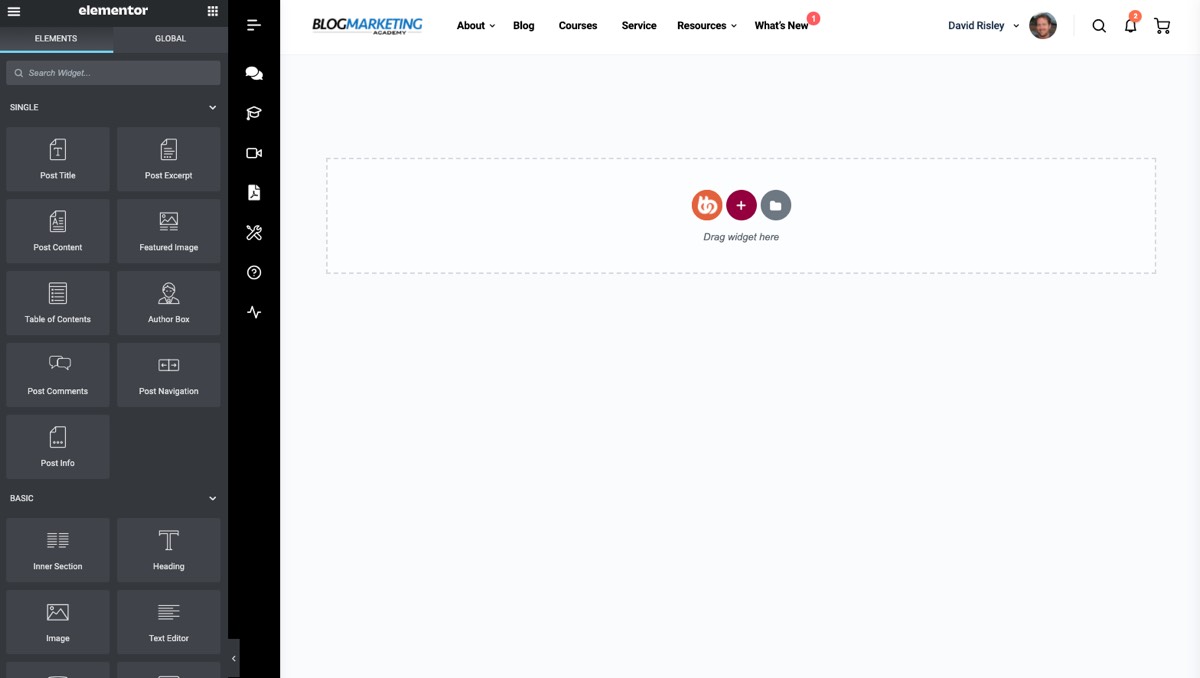
Note that you’ll have a number of components available to you specific to blog post templates, such as Post Title, Excerpt, Post Content, Featured Image, etc. And using those components as well as the others that Elementor has, you simply design your own template visually.
Making Your New Template Actually Show Up
Designing a template is one thing, but to see what it’ll look like on your actual blog, you need to tell Elementor to actually use your template.
This is where the actual Elementor Theme Builder interface comes in. You can access it in 2 ways:
- Inside the Elementor Editor, top menu, then Theme Builder.
- From the Theme Builder screen in the admin panel, you can open up the “New” Theme Builder.
The Theme Builder interface will show the blog theme templates you’ve created. Here you can see mine in the Theme Builder. One is for standard blog posts and the other is for the video post format.
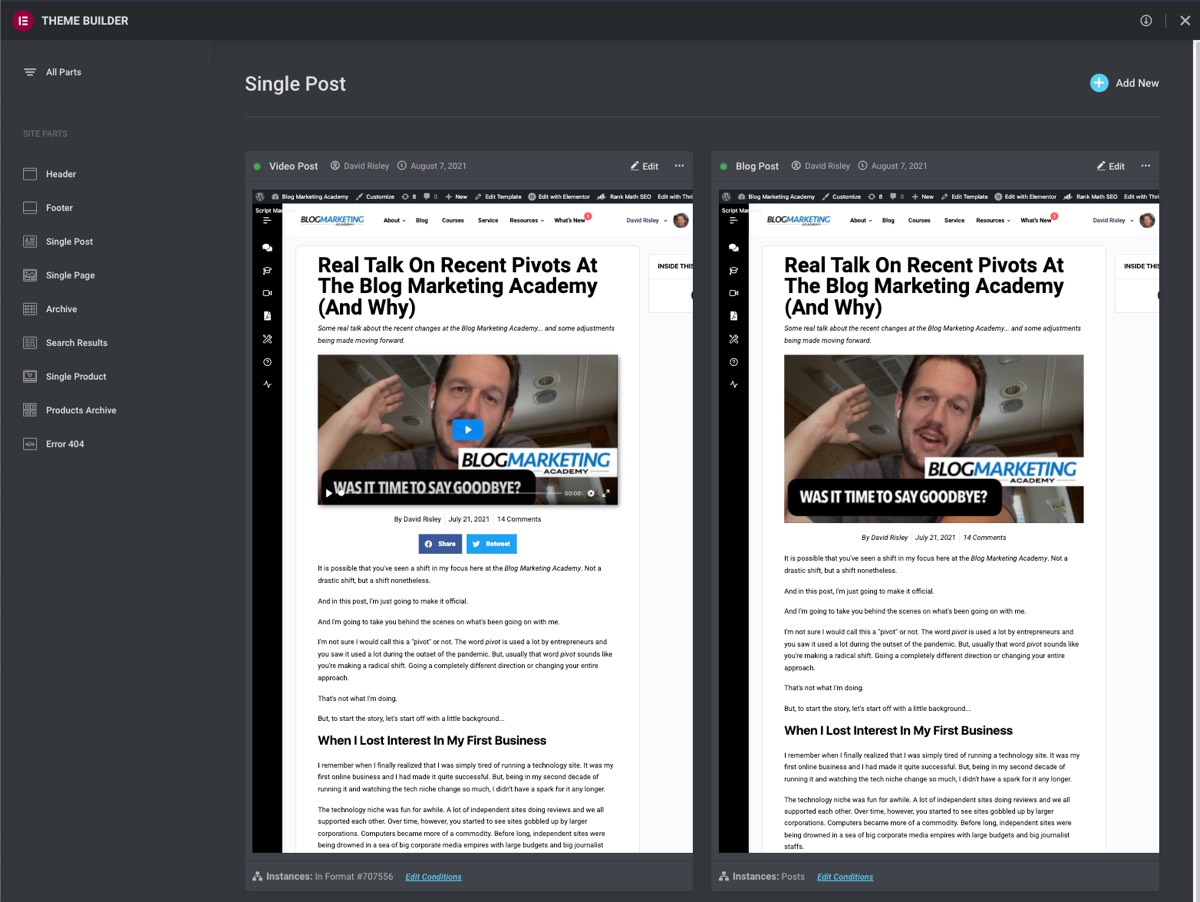
Under each template you’ll see a link to Edit Conditions. This is where you can set when and where that particular template will be used on your site.
On this screen, you’ll set your display conditions using include/exclude rules.

For my video format, I just made it so it includes all posts in the format of Video. For the global post template, I included all posts, but excluded all posts of the video format.
Using these include/exclude rules, you can set posts for any set of conditions you want. You’ve got a lot of flexibility with when and how these templates are used across your site.
Create Your Blog Index Page
The BuddyBoss blog index page is quite simplistic. Chances are, you’ll want more than what it comes with out of the box.
The beauty of Elementor is that you can easily build your own.
Simply create a page. Just call it “Blog”. In my case, I used the built-in Elementor Full Width page template as a starter.
Using the Elementor editor, you just design your blog index page as you see fit. The component that will bring the list of posts into the template is just… “Posts”.
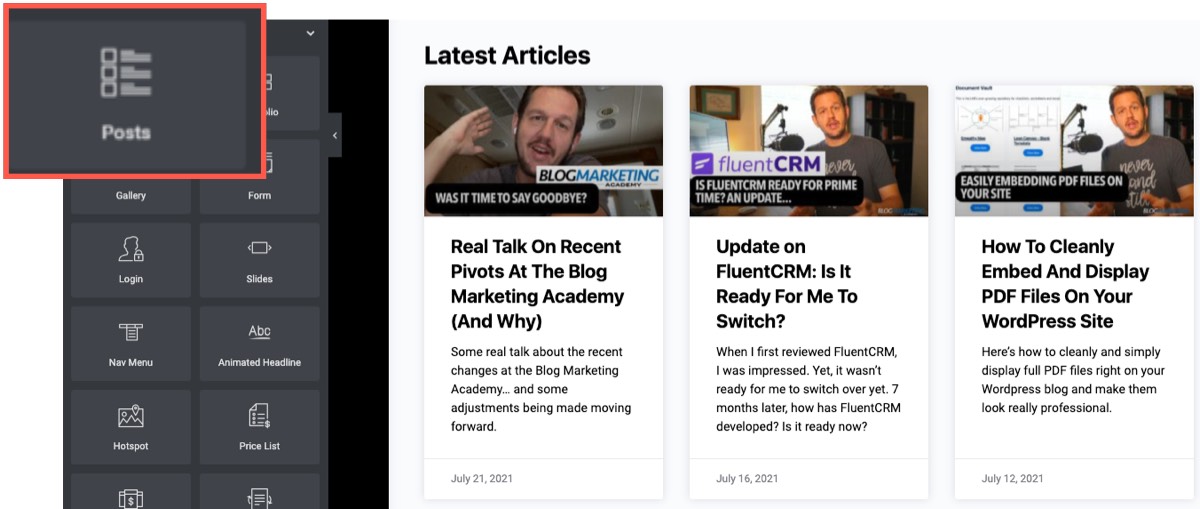
You drag that in there and then use the options for that component to modify the look and feel to how you want it.
From the perspective of Wordpress, this “Blog” page is just another page. But, it is perfectly capable of serving as your main blog index page.
So, simply include this “Blog” page into your navigation menus and it will serve as your blog. Note that there’s no need to assign this page as your Posts page in Wordpress settings.

That’s pretty much it.
Let Somebody Else Deal With The “Tech Stuff”
With WP Concierge, you no longer have to deal with the tech stuff. I’ll provide all the software, maintain it for you, and provide personal support along the way. All included… and you’ll be on a first name basis with your “web guy”
Final Thoughts
This post is not meant to be a full tutorial on using Elementor. I’m not going to show you here how to use every component of the editor to visually design your template.
In the end, I’m just showing you how you can use Elementor Pro to customize aspects of the BuddyBoss Theme without having to dive into the child theme code of BuddyBoss.
Sure, you can use the child theme and get nerdy. But, it is time consuming. If you like to do that, then have at it. I prefer the speed and convenience of using Elementor.
And this same setup will work for most components of the BuddyBoss theme. Not just blog posts. You can use it to modify all kinds of aspects of BuddyBoss.
It basically just “overrides” the default theme using Elementor. But, the two products work together almost seamlessly. And some aspects of the BuddyBoss theme are just obviously left to be simplistic and they assume you will just make your own.
That’s how the BuddyBoss Theme blog layout works. The actual blog pages are simple and have only a handful of options as part of the official theme.
Want more? Want something that looks better?
Then, use Elementor Pro.
APRIL 2024 UPDATE: While I still work with BuddyBoss on behalf of many of my clients, I no longer personally use BuddyBoss on this site. I switched it over to Kadence Theme. Read more about switching from BuddyBoss to Kadence here.

David Risley has been building on the web since 1998 and founded Blog Marketing Academy in 2008. After years helping bloggers and online entrepreneurs grow their businesses, he now runs Concierge — a done-for-you WordPress management service for membership sites and online businesses. He manages hosting infrastructure, handles the technical heavy lifting, and keeps client sites running at peak performance. Click to read his full origin story.