How to Migrate Your WordPress Blog to a New Host Using Migrate Guru
I find that Migrate Guru is the easiest and most reliable way to migrate (or move) your WordPress blog to a new web host. It is also free. Here’s how to do it.
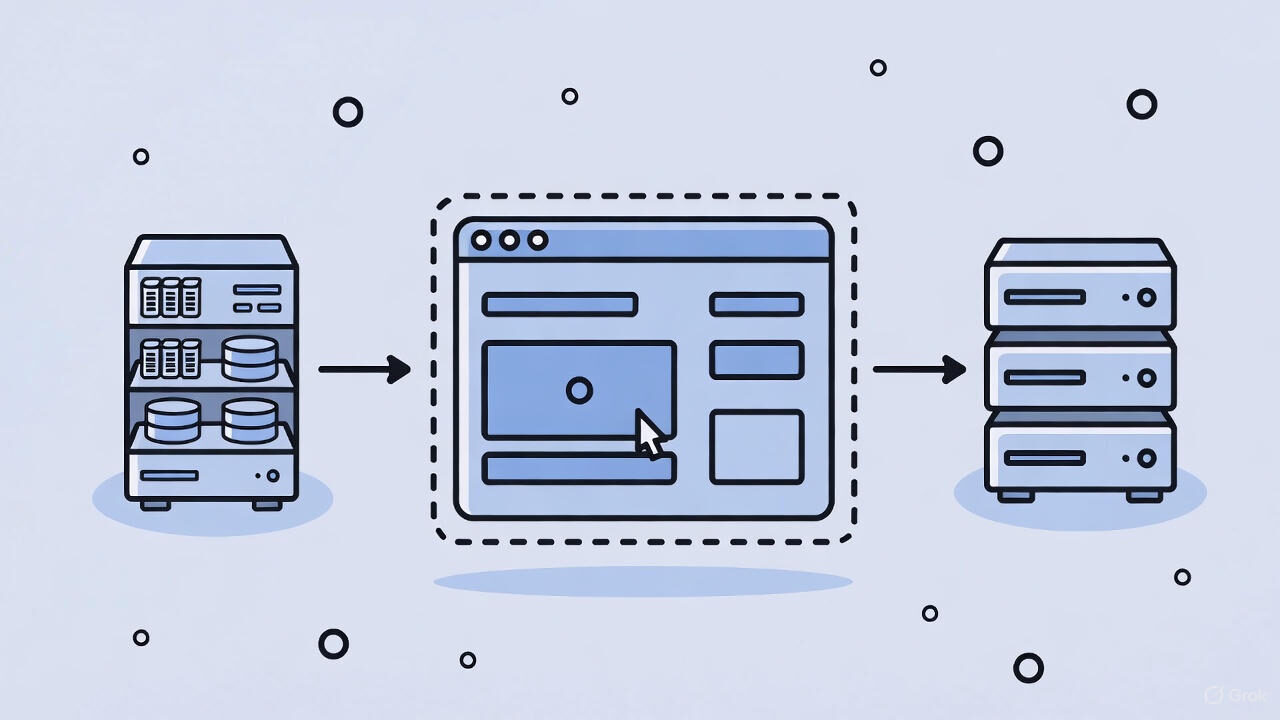
Moving a WordPress site used to involve downloading files, exporting databases, updating wp-config, and manually fixing broken URLs. Today the process is far easier. You can migrate a WordPress site using a free plugin called Migrate Guru, and the entire job becomes simple, reliable, and fast.
Migrate Guru is what I use all the time to migrate websites for my clients. I’ve likely used it hundreds of times by this point.
Migrate Guru is built specifically for moving or cloning WordPress sites. It works with almost every web host, handles very large sites without timing out, and automatically updates all URLs inside the database. It also performs the heavy lifting on Migrate Guru’s own servers, which means it does not overload your existing hosting account.
Below is a straightforward, updated guide that replaces the older manual process.
Why Use Migrate Guru
Migrate Guru has become the go-to tool for moving WordPress sites for several reasons:
- It is free and maintained by the team behind BlogVault, which is a trusted backup service.
- It works even with very large sites. Many users successfully migrate sites over 100 gigabytes with no issues.
- It performs URL rewriting automatically. This avoids broken links or incorrect settings after the move.
- It keeps load off your own server. Since the migration engine runs on Migrate Guru’s servers, your site does not slow down or fail during the transfer.
- It supports most major hosting companies quickly. If a host is not listed, you can still migrate using a migration key.
This makes it ideal for bloggers, membership site owners, and business site operators who simply want a clean, stress-free migration process.
Before You Migrate…
Before you begin, you need to prepare your destination site. You will first create a brand new, fresh WordPress installation on your new web host.
On this new installation, you do not need to install any other plugins besides Migrate Guru itself.
What I usually do is use the one-click installer (which almost every web host provides) to spin up a brand new WordPress site. I use the host’s temporary, internal URL for the site. I do not route any domains to this site yet. We will do that once everything has been moved over.
Once you have a new, default installation of WordPress accessible on the new host, we can begin.
Step-By-Step Guide to Migrating With Migrate Guru
The way this works is pretty simple…
You have your origin site (on the old host) and the destination site (on the new host). You’ll install Migrate Guru to both of them. Then, you’ll use the plugin to clone the origin site to the destination site. Then, you’ll verify that the site is working on the new host. Once it is OK, you will then change the URL for the site to make it accessible via your site’s domain.
Let’s go through it…
- Install Migrate Guru on the destination site.
Log into WordPress on your new hosting account, go to Plugins → Add New, search for Migrate Guru, install it, and activate it. - Get Your Migration Key from the destination site.
Open the Migrate Guru menu on the new site. On the first screen, you will see a box where you can get your migration key. Simply copy this migration key to your computer’s clipboard. This migration key is all that is needed for Migrate Guru to know exactly how to clone your site over. - Install Migrate Guru on the current (source) site.
Log into the WordPress site you want to move, install and activate Migrate Guru there as well. - Enter your email to receive notifications.
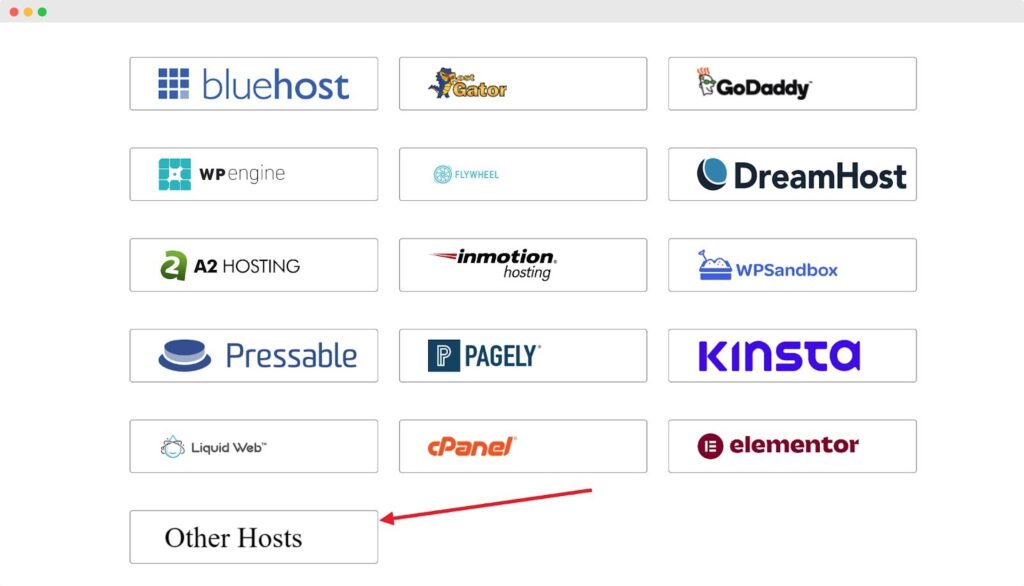
Migrate Guru will send you updates during the process, including completion. You will not be added to any email list. You will also need to agree to the terms & conditions. - Choose “Other Hosts” then paste in your Migration Key.
You will see a list of web hosts to choose where you’re migrating your site to. You do not need to be using one of these hosts. In fact, I always simply choose “Other Hosts” irregardless. Then, on the next screen, you will paste your migration key (from step 2).
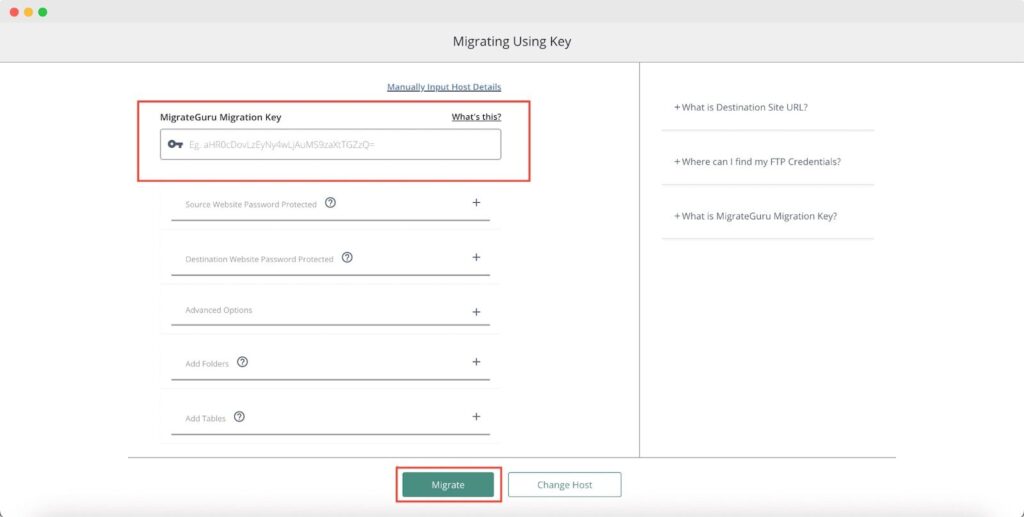
- Start the migration.
Click the button to begin. Migrate Guru will copy your full WordPress site, including themes, plugins, uploads, and the database, directly to the new host. This can take a little while, depending on the size of your site. Go have a cup of coffee or something. 😜
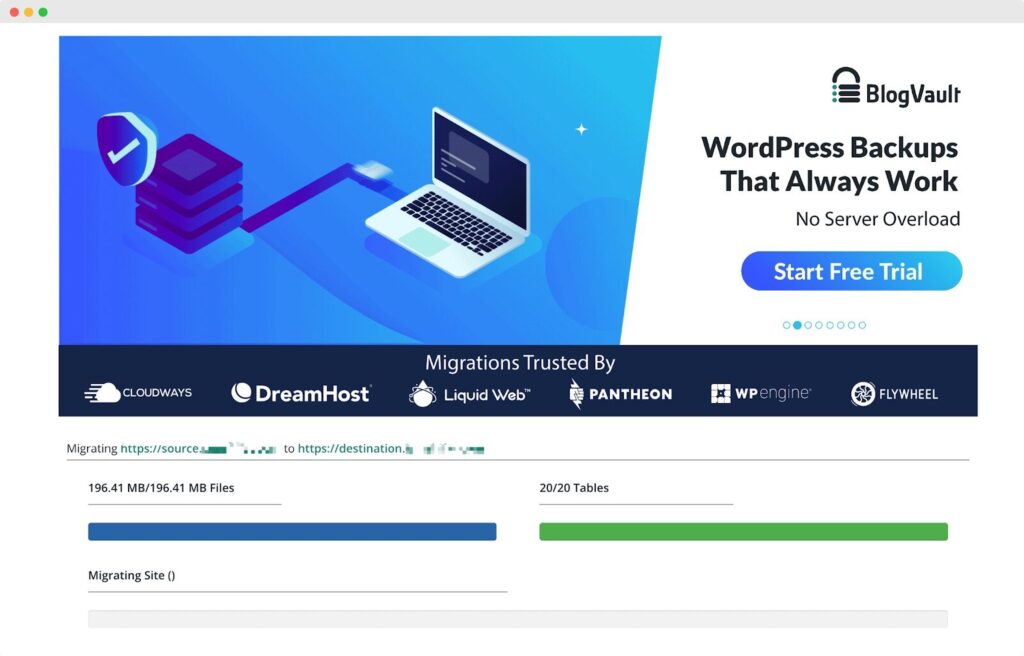
- Wait for the email confirming completion.
The process runs on Migrate Guru’s own servers. You do not need to keep your browser open. You will be notified in your browser when the process is completed – as well as receive an email notification. - Verify the new site.
Visit the new site’s URL. Check that pages load properly, images display, plugins work, and everything looks correct. It is common to have some notifications about the URL change and licenses for plugins (since you’re using a temporary URL). That will be fixed up in the post-migration process. - Go Live with the new site by changing you domain DNS settings.
Your host will walk you through this, since every host is different. You will need to change the URL of your new site (on the new host) to use your regular domain instead of the temporary URL. And you will need to make changes to your domain DNS so as to route traffic to the new host.
At that point, your site is technically live and working on the new web host.
In rare cases, there are hiccups. While it doesn’t happen often, I have seen Migrate Guru fail in the middle of a migration due to errors. Usually, this is causes by permissions issues or firewalls blocking the BlogVault servers from cloning the website. If that’s the case, you will need to consult your host on how to enable it to function.
After the Migration
Immediately after cloning your site to it’s new server, you’re going to often see some things that don’t look right immediately. For instance:
- You may have plugins sending up notifications about URL changes.
- You may have plugins complaining that they are unlicensed. This is caused because they do not recognize the temporary URL.
- You may have to reset some API keys that have been lost along the way. For instance, FluentSMTP often loses API keys for your email provider during a migration. This is because they are stored in such a way which is dependent on the site’s URL. Now that the URL is different, the API key is not set correctly.
You can ignore most everything you see until you actually change your domain over to go live. Most of those issues will go away once you’ve done so.
Before changing your domain DNS, however, you can do the following:
- Re-enable any caching or security plugins. Ensure caching is operational.
- Remove Migrate Guru from the destination site if you no longer need it
- Do a general check around the site to ensure things are where you left them, that pages work and look like they’re supposed to.
Once you have gone live with it and your domain is now pointing to the new web host, you can update any services that depend on your site’s URL, such as email marketing tools or payment gateways.
Why This Method Is Better Today
Compared to older migration approaches, using Migrate Guru offers several clear advantages.
- It eliminates manual database imports.
- It avoids editing wp-config or running SQL queries.
- It handles serialized data safely, which is a common point of failure in manual migrations.
- It reduces downtime because your live site remains untouched until you switch DNS.
- It works reliably even on low-resource hosting accounts since the plugin uses external servers to process the migration.
For most WordPress site owners, Migrate Guru provides a dependable and modern solution that saves time, reduces headaches, and protects your data.
Popular Right Now
What If Your Website Was Just… Handled?
I manage WordPress sites for creators and small teams who don’t want to fight tech anymore. Hosting, updates, security, performance — plus a real human you can ask anything.
Tools, checklists, and resources for solopreneurs who want to spend less time on tech — and more time growing. With more tools coming regularly. 😎

