How To Clean A Bloated WordPress Media Library
5 rules for how to properly manage your Wordpress Media Library… and some tools I used to shrink a 5GB library by about 45%!

I was working with a client site recently that had one of the most bloated Wordpress Media Libraries I’d ever seen. It was so big, in fact, that it was taking up too much disk space on his hosting account and I couldn’t even create a staging site without it failing due to insufficient disk space.
So, in this post, I’d like to talk about a couple of VERY important things on how you manage your Media Library:
- How to keep your media files efficient so as not to bloat your Media Library
- How to clean up a Media Library that is already full of crap.
Let’s get going…
How The Wordpress Media Library Works
When you upload a file (usually an image) to your Media Library, a few things happen:
- The file gets stored on the file system of your server.
- A corresponding entry gets saved in your Wordpress database.
- Wordpress may generate multiple versions – of different sizes – of the same image.

So, when you are going through your media library in your Wordpress admin, it is pulling those entries out of your database. The files themselves are sitting on the file system and the database just has a record of where they are.
Also, when you insert an image, you have different sizes available (large, medium, thumbnail, etc.). All of those sizes sit on the file system as well. Sometimes, themes and plug-ins define their own custom image sizes, too. So, what happens is that every image you upload might turn into 5 or more separate files behind the scenes.

Much of the time, these custom image sizes aren’t even used. Yet, they sit there and take up disk space on your server.
If you want to take a look for yourself, all you need to do is log into your server via FTP or using your web hosts file manager. Navigate to the folder for your site called /wp-content/uploads/. What you will usually see is a list of folders by year. Inside each year you will have folders for months. And inside each of those folders, you will find the actual image files.
5 Rules For An Efficient Wordpress Media Library
The best option for keeping things nice and clean here is to use good habits to begin with.
Some of these good habits are very important for your site’s load time and, therefore, your SEO. This isn’t just a matter of disk space. Bloated images slow down your site and that means Google is liable to penalize your site or downgrade your potential search rankings.
Further Reading: The Ultimate Guide To Search Engine Optimization For Bloggers
So, you have every reason in the world to get this right. 🙂
Let’s dive in…
#1 – Use The Correct Image Formats
You have different kinds of image files, such as JPEG, GIF, PNG, etc.
One of the most common mistakes is to use PNG files when there is no reason to. A PNG file uses less compression natively and that means the file sizes will be bigger. PNG files are best used when you need a transparent background. If the image you are uploading does not have a transparent background (like a typical photo), then uploading it as a PNG is simply going to make it unnecessarily large.
JPEG is, by far, the preferred image format. It has higher compression, meaning lower file size. JPEG does not support transparent backgrounds, though, so that’s when you should use a PNG.
GIF used to be quite common, but today really should only be used if you want an animated GIF image.

With my client mentioned above, he had gone for years taking screenshots on his Mac and uploading them completely “raw”. By default, the Mac takes screenshots in PNG format. Not only that, they are very UNoptimized PNGs. He had numerous images on his system that were pushing 1MB all by themselves. Converting those same images to JPG reduced the file sizes by up to 90%.
So, don’t just blindly add files to your Media Library. Look at the size and the file format. If necessary, convert it first.
#2 – Reduce Your Image Dimensions Before Upload
Another thing I frequently find is that people took a photo with their camera and simply upload that image to WordPress at full-size.
Don’t do that.
Most cameras (even phones) take massive photos that can be 3,000 to 5,000 pixels wide. These massive photos look nice. You can also make them appear on your website any size you want. But, the massive dimensions are WAY bigger than you will ever need on your website. So, it is a massive amount of bloat to upload it that way.
In most cases, you’re probably never going to need to display a photo on your blog bigger than the full-width of your blog post. On my blog here, I pretty much cap out all my images at around 1,000 pixels because nothing ever displays larger. For preview images for social media, I use images 1280×720.
So, the point is…. REDUCE your image size to something reasonable before you upload it. It is an extra step, but worth it.
#3 – Use An Image Optimization Plug-in
It is convenient to use a system that will help automate some of this for you. There are a number of plug-ins that will automatically optimize images for you as you upload them.
I personally use and like the Imagify plug-in.

Imagify does a great job. Even if you have uploaded the proper format and maintained a reasonable image size, Imagify will still go in and optimize that image to make it as efficient as possible. It shrinks image files without making them look any different.
#4 – Use File Names That Make Sense
A lot of people just upload images to WordPress and insert into their post and… that’s it. No thought whatsoever to actually making that Media Library useful.
My client was taking Mac screenshots. The Mac, by default, names everything “Screen-Shot-YYYY-MM”….. blah blah blah. It is a big long, nasty file name with a time stamp on it. And all these PNG files were uploaded just like that.
Problem is that you can’t FIND anything later! Not only that, you’re sacrificing the SEO benefit of those images. That’s because…
- You can search your media library for images you want, but it will use the file name, description and title to search. It obviously can’t search the contents of the file. Only what you put into your database.
- When you insert an image, the filename and title go into the HTML code of the post. Google spiders that and you can actually help your rankings and get more traffic just through proper image SEO.
So, to make your Media Library useful, I recommend that:
- Give your images a meaningful file name before you upload it.
- Enter an image title and alt tag for the image.

#5 – Don’t Upload Multimedia To Your Media Library
It is fine to upload images. I even store quite a few PDF files in my Media Library. But…
I do not recommend uploading audio or video files. Especially video.
Videos are not only very large files, but are significantly more demanding on your web host to serve them. Your web host is not optimized for that. If they catch you doing it, they’re quite likely to complain.
Never host videos from your WordPress media library. I always recommend uploading them to Youtube, Vimeo, Amazon S3 or some other suitable service. Then, embedding them into your posts from those places.
As for audio files, it is not ideal to host those from the media library, either. They are not as demanding as a video (since the files are smaller), but it is still not the best option. If it is an MP3 and you don’t expect a whole lot of traffic to it, then you can probably get away with it. But, if you’re talking about a public audio feed such as a podcast, I strongly recommend you use remote podcast hosting such as Libsyn and avoid uploading episodes to your WordPress media library.
How To Clean Up A Media Library That Has Already Gotten Bloated
So, what do you do when you have a Media Library that was not properly maintained?
This was the case with this one client. I have been helping him get some matters of his membership site in order, but we first had to deal with the massive amounts of bloat inherent in his existing site. When I first went in there, his media library was 4.96GB all by itself!
Just for the sake of comparison, the entire site of Blog Marketing Academy (including all media files) is just over 1 gigabyte in file size. And this site is over a decade old and has some clutter in there. So, his Media Library was almost 5X as big as my whole site.
First off…
Don’t Seek Total Perfection
It is tempting to go in there and try to make that Media Library as efficient as humanly possible and eek out every last megabyte. But, let’s keep in mind…
You can waste a lot of time on this. And you’ve probably got more important things to do. So, I would do the obvious stuff mentioned below. It will clean out a lot of trash.
But, we don’t need perfection here. When you’re done, you still might have some files in there that aren’t used anywhere on your site or in any of your blog posts. That’s OK! In fact, it is normal. WordPress will always auto-generate image files that you’re probably not using.
As long as we aren’t doing any bad habits, everything will work just fine.
Back Up First!
Since you’re going to be messing with the actual files on your site here, I definitely recommend running a backup first. You’ve got a couple ways to go here:
- Have your web host run a manual backup. Any decent host will make this easy to do inside your account.
- Optionally, you can download your whole Media Library to your own computer using an FTP program. It might take awhile, but then you will have a full backup of every single file in your Media Library right on your hard drive.
OK, backed up? Let’s go…
Converting PNG Files To JPG
Converting images to JPG can be done on your computer. But, what do you do when you already have hundreds of bloated PNG files in your Media Library that you want to retroactively convert to JPG in order to recover the disk space?
Use the PNG to JPG plug-in.
This plug-in works like a champ. You can define the settings you want and it will automatically convert any new incoming PNGs to JPG. But, more importantly, you can have it go through your Media Library and convert all PNGs to JPG files. You can control which ones it does, too, so you won’t inadvertently convert some you didn’t want to.
As it converts the files, you can have it remove (or not remove) the original PNG. Since we’re trying to reduce disk space, you’re probably going to want to delete the PNG.
It also takes care of the original content that the image was posted in, converting to the new format. In other words, you won’t have any weird broken images that you need to fix later.
Here’s what it reported when I ran it on my client’s site:

But, that’s not even the full picture. That 687MB we shaved off it was just the full-size, original version. It doesn’t even count all the auto-generated resized versions that were also deleted and re-generated.
All in all, I shaved almost 2 gigabytes off his Media Library merely with this one operation! We started at 4.96GB and we got this down to 2.97GB.

That’s a massive improvement. We shrunk it by almost 40% already. But, we don’t stop there.
Optimizing Old Images Files
Imagify is one of the best image optimization plug-ins I’ve seen. There are others, of course, but Imagify is just easy to use and very effective.
For most site owners, the free Imagify account is more than enough. Most of us just don’t upload enough images each month to go over the free account level.
But, when you want to go back and retroactively process and optimize images already put into your Media Library, you might need to pay. They offer one-time top-offs of your available bandwidth, however. For instance, you can optimize 1GB of images for just $9.99.

The plug-in offers an option to estimate how much bandwidth you will need to optimize your whole library. It will count the total file size of all original images and let you know then you can judge from there.
The system is quite effective. On the average, it will reduce your image file sizes by about 50% without making them look any different at all.
Some alternatives to Imagify you can look into are:
There’s really no shortage of these things. But, definitely… use one.
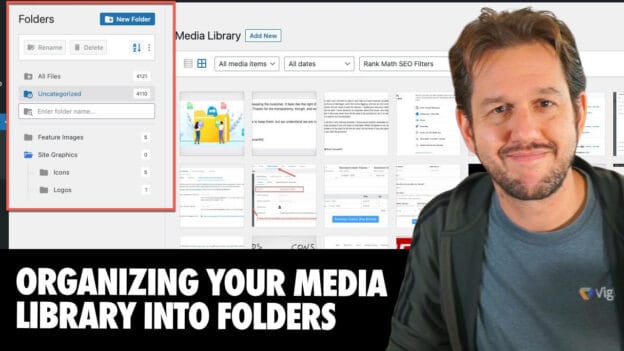
Removing Old, Unused Image Sizes
WordPress ends up creating a lot of different sizes of the exact same image. Many times, they just sit there totally unused, too.
There are 3 main places where the sizes for these image sizes are determined:
- In WordPress settings, under Settings > Media. This is where you can define thumbnail, medium and large image sizes. These are the defaults.
- In your active theme. Some things register custom image sizes for their own purposes.
- In one or more active plug-ins. Plug-ins sometimes also need their own image sizes so will tell WordPress to auto-generate certain sizes.
When you navigate the folders in your uploads folder, you will see all of the various image sizes. Each one will have the specific image dimensions added right to the filename.

You can see here there are essentially only 3 actual original images in this folder. All the rest are auto-generated resizes.
In a lot of cases, it honestly isn’t worth the hassle to delete all these unused sizes. WordPress will keep on generating them. But, if you want to do something about it, here’s what to look into…
First, you need to ensure WordPress isn’t making any NEW unused sizes. Sometimes, images were made by a theme or plug-in that you don’t use anymore, but the images remain. Sometimes, it is impossible to find out what the source of those images are.
If you want to physically remove those files from the file system of your server, you’ve got a few options:
- Delete them manually using the file manager or FTP directly on your server.
- Try a plug-in. Media Cleaner is a pretty powerful plug-in that can help determine which media files are not being used and allow you to remove them.
If you know that certain image sizes have definitely been unregistered but still want to get rid of the old files, you can use a plug-in like Regenerate Thumbnails or Force Regenerate Thumbnails to force re-generation of thumbnails and, in the process, have it remove the old ones no longer used.
I did this on my client’s site…

The newer versions of WordPress auto-generate these massive image sizes of 1536×1536 and 2048×2048. They are pretty much useless. So, using Regenerate Thumbnails, I can have it re-process all thumbnail images, but in the process REMOVE any image sizes that I specify. By NOT checking to process certain sizes and telling it to delete the ones I ignore, it removes them from the file system.
Moving Files Off-Site
One option that is handy in some cases is to offload all or part of the Media Library to an outside service. You can then manage the Media Library within WordPress, but the files themselves would be located elsewhere.
Amazon S3 is a pretty common option. This handy guide will show you how you can move images out of your Media Library and onto Amazon S3. Here is another guide that gives their take on the same thing.
Honey, I Shrunk The Library!
So, after running some operations on my client’s Media Library, I was able to shrink it by about 45%.
We took it from 4.96GB down to 2.76GB.
It was still a bit bloated, but I decided to just leave it there and move onto other aspects of the project that are more important. I had solved his disk space issue on his host.
If I were to keep pursuing a smaller library, I would have manually removed certain file sizes. Plus, he had a bunch of MP3 audio files in the library, too. Some of them not very optimized and bigger than they needed to be. So, we would have either re-encoded them to shrink them or simply offloaded them to Amazon S3.
But, as I said before… you have to keep it reasonable. We can’t reach perfection here. There will always be some bloat to the WordPress Media Library. You just do what is reasonable and solves your problem (like disk space on your web hosting account)… then concentrate on things that will actually grow your business.
If you would like help performing this operation on your own site, you can hop into THE LAB and ask questions and I’ll be sure to answer directly. You can enroll in a free membership. You can also just ask below.
If you would like it done for you, you can also check out our WordPress Tech Services. We’ll take it off your hands.

David Risley has been building on the web since 1998 and founded Blog Marketing Academy in 2008. After years helping bloggers and online entrepreneurs grow their businesses, he now runs Concierge — a done-for-you WordPress management service for membership sites and online businesses. He manages hosting infrastructure, handles the technical heavy lifting, and keeps client sites running at peak performance. Click to read his full origin story.